Installation Guide
Prerequisites
Before installing the Website Access Restriction Tool, ensure your system meets the following requirements:
- Operating System: Windows 7 SP1 or later (Windows 10/11 recommended)
- Processor: 1 GHz or faster (2 GHz dual-core or faster recommended)
- RAM: 2 GB minimum (4 GB or more recommended)
- Storage Space: 100 MB minimum (500 MB recommended)
- Network: Internet connection for updates and initial setup
- Permissions: Administrative privileges are required
You must have administrative rights on your computer to install and run the Website Access Restriction Tool, as it needs to modify system files and network settings.
Downloading the Tool
The Website Access Restriction Tool is available in different versions to meet your needs. Choose the version that best suits your requirements:
International Version
RecommendedThe standard version with English interface and global features.
- English interface
- Standard feature set
- Regular updates
Chinese Version
PopularFull Chinese interface with localized features for Chinese users.
- Chinese interface
- Localized features
- Regular updates
China Version
RegionalOptimized version specifically for users in mainland China.
- Chinese interface
- China-specific optimizations
- Alternative update servers
Choose the International Version if you prefer an English interface or are located outside of China. The Chinese Version is ideal for Chinese speakers who want the standard feature set with localized interface. The China Version is specifically optimized for users in mainland China with region-specific features and faster access.
All download requests are verified to ensure software security. The software code has been open-sourced and confirmed to be free of security threats through security review.


Installation Steps
Once you've downloaded the installer, follow these steps to install the tool:
- Run the Installer
Locate the downloaded installer file (typically named
WebsiteAccessRestrictionTool-Setup.exe) and double-click it to run. - Grant Administrative Permissions
When prompted by User Account Control (UAC), click "Yes" to allow the installer to make changes to your system.
- Welcome Screen
Read the welcome information and click "Next" to continue.
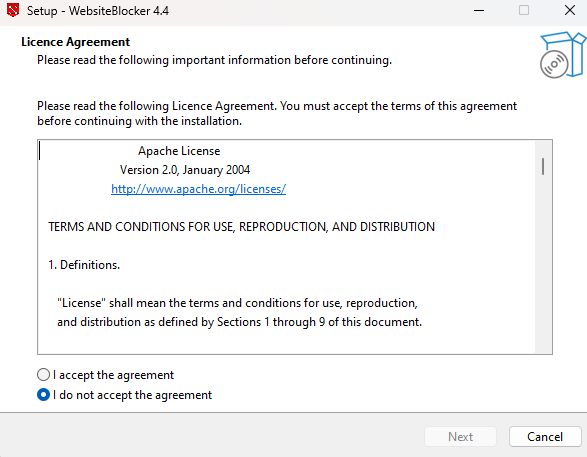
- License Agreement
Review the end-user license agreement. If you agree to the terms, select "I accept the agreement" and click "Next".
- Choose Installation Location
Select the folder where you want to install the tool. The default location is
C:\Program Files\Website Access Restriction Tool. Click "Next" to continue. - Installation Options
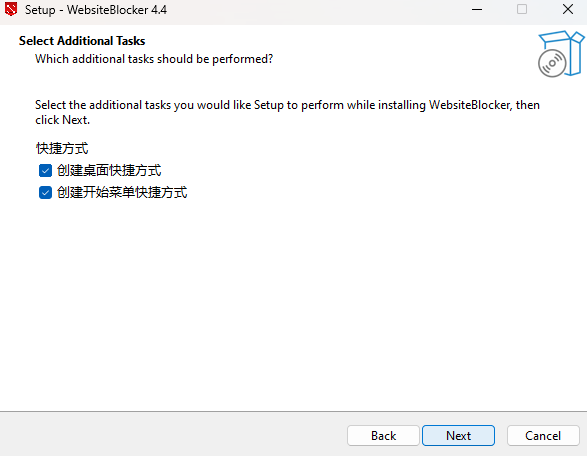
Choose any additional components you want to install:
- Desktop shortcut
- Quick launch shortcut
- Ready to Install
Review your installation settings and click "Install" to begin the installation process.
- Complete Installation
Wait for the installation to complete. Once finished, click "Finish" to exit the installer.
Post-Installation Setup
After installation is complete, follow these steps to set up the tool:
- Launch the Application
Start the Website Access Restriction Tool from the Start menu or desktop shortcut.
- Initial Configuration
The first time you run the tool, you'll be guided through the initial setup process:
- Set a master password to protect your settings
- Choose your preferred blocking mode
- Select whether to enable automatic updates
- Test the Installation
Test that the tool is working correctly by temporarily blocking a test website and attempting to access it.
Troubleshooting
If you encounter issues during installation, try these solutions:
Permission Issues
If you're experiencing permission-related errors:
- Ensure you're logged in with an administrator account
- Right-click the installer and select "Run as administrator"
- Temporarily disable your antivirus software during installation
- Check if User Account Control (UAC) is blocking the installation
Installation Fails
If the installation process fails:
- Ensure you have sufficient disk space
- Check that your system meets the minimum requirements
- Temporarily disable any security software
- Download the installer again in case the file was corrupted
- Try installing in Safe Mode if other solutions don't work
Browser Extensions
If browser extensions aren't working:
- Ensure the extensions are enabled in your browser settings
- Restart your browser after enabling the extensions
- Check if your browser is supported by our extensions
- Update your browser to the latest version
- Reinstall the extensions if necessary
Blocking Not Working
If website blocking isn't functioning properly:
- Restart the application after installation
- Check that the service is running in the background
- Verify your blocking rules are correctly configured
- Clear your browser cache and DNS cache
- Restart your computer if the issue persists
Next Steps
Now that you've successfully installed the Website Access Restriction Tool, you're ready to configure it for your needs:
- First Configuration - Set up your initial blocking rules, even without browser extensions
- Advanced Configuration - Explore advanced settings and options
- Basic Setup Tutorial - Hands-on tutorial for common use cases
- Use Cases - Examples of different blocking scenarios
If you need further assistance, please refer to our Troubleshooting Guide or FAQ section.